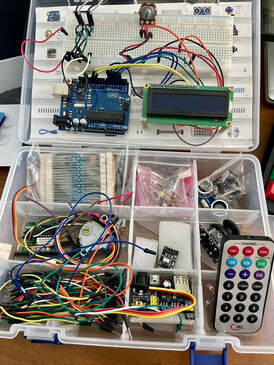
 Ultimate Uno R3 Components Kit is an Arduino Uno microcontroller and corresponding electronic parts. The kit is marketed as an entry-level microcontroller for programming. The kit includes the programmable board, led lights, display, breadboard, wires, motors, and sensors. The Arduino Uno uses a programming language based on C++, using software that can be downloaded from their website. The Ultimate Uno R3 Components Kit offers generic instructions and a plethora of electronic components. The packaging and information provided are intimidating for beginners. You must be comfortable with seeking out information and troubleshooting because these resources are not included in the kit. There is a level of intimidation whenever starting to use a kit like this. These issues speak to the nature of microcontrollers and programming in my experience. It is hard to find kits that offer the right amount of guidance with the electronic's capabilities to make it interesting. Between price and support along the way, microcontrollers like this can be difficult for students to experience. Both the denotative and connotative levels of meaning for the Ultimate Uno R3 Components Kit highlight issues for beginners. There is a lack of beginner awareness to make these products accessible to all age groups. While some products do a better job at meeting learners where they are, they all come at a price. For example, Lego Mindstorms is a great product, but it's not accessible to most at a $400 price tag. Getting students excited about computer science can be challenging; this is especially difficult when products are not accessible to them.  Blink LED
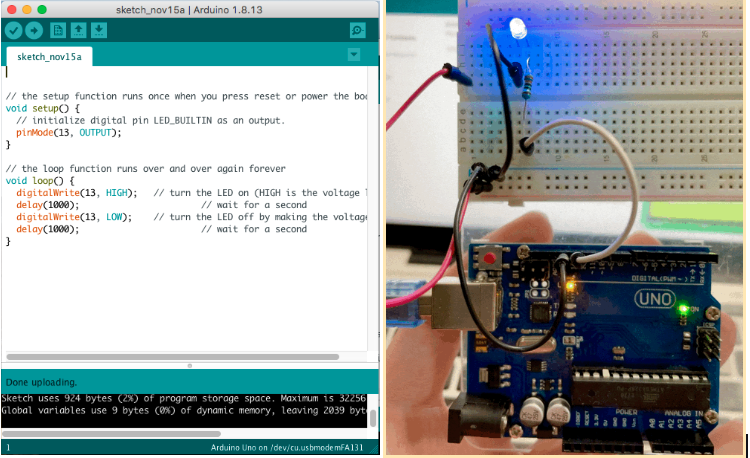 Notes: Setting up a blinking light with an Arduino is a very basic functionality but one that is a precursor to many other projects and concepts. Understanding a simple circuit opens up many more possibilities. When building, it is important to call out the 220 ohm resistor and the way to follow the circuit. By using examples provided within the Arduino Sketch, you can get students started quickly with less focus on code and more on the build itself. LCD Display
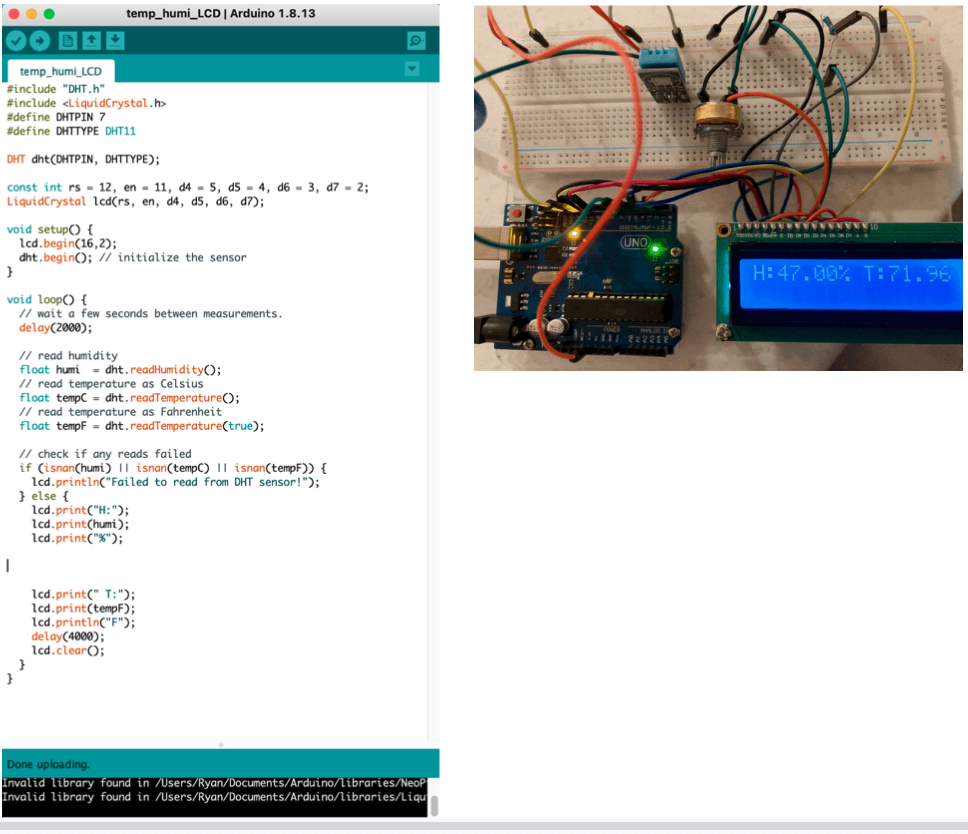
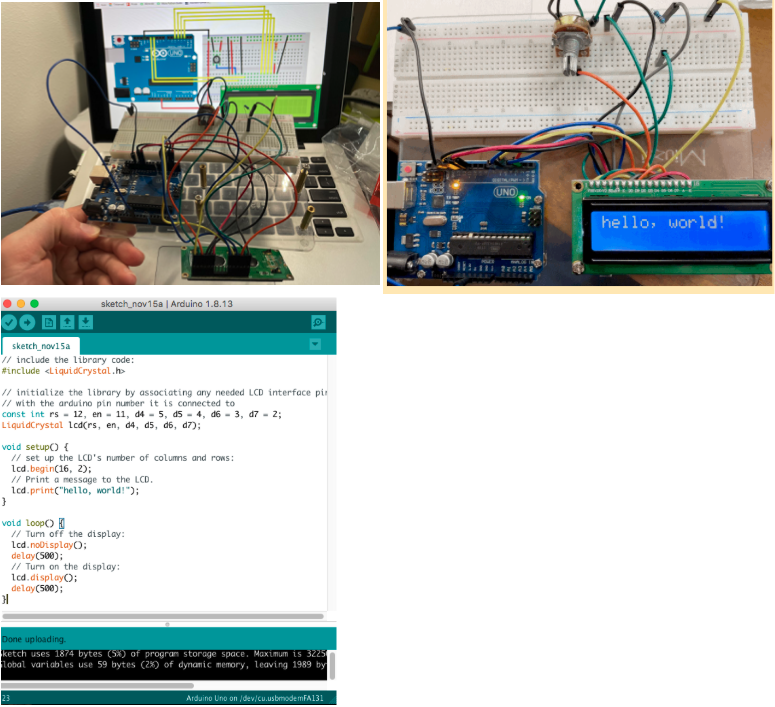 Notes: Just like in my previous example, Arduino provides both a setup diagram and code to get you started with the LCD display. It’s a great start because the sheer amount of cables running from the display and use of a dimmer is intimidating. Following the process step by step will ensure that students can have a read out for future projects. Programming Neo Pixels
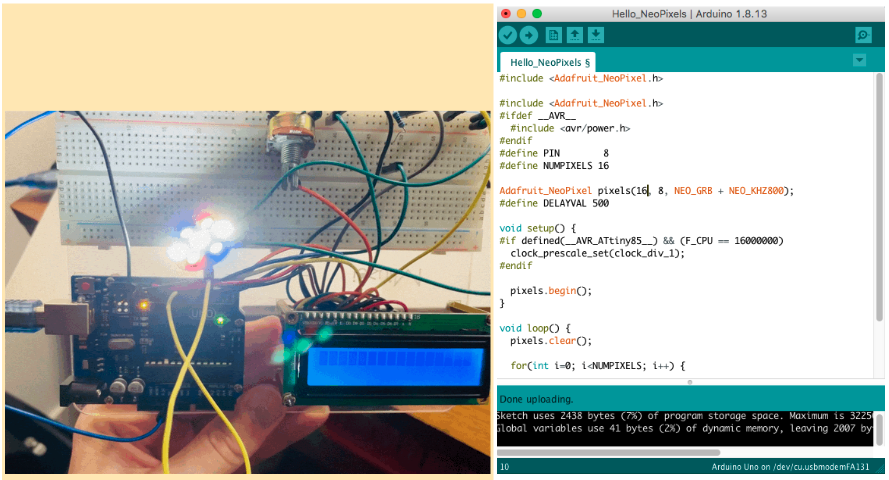 Notes: While it’s hard to see, the Adafruit Jewel 7 has been plugged into pin 8 with a positive and gnd wire connected. I have programmed it using a snippets of code for the neopixels onboard the Jewel. It involves oscillating between various colors from its many RGB LED’s. My next 3 projects with the Arduino Uno involved a temperature/humidity sensor and deviating from my original plan, incorporating the LCD display as a read out. This will be part of my critical making lesson.
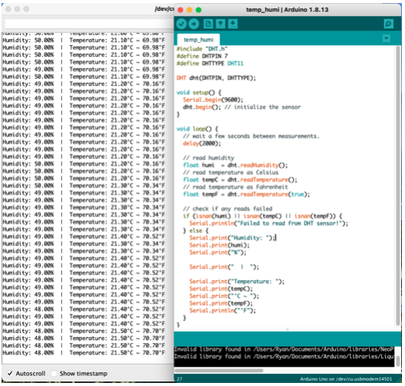
Temperature and Humidity Sensor with LCD readout
0 Comments
|
AuthorMy name is Ryan MacLeod and I live in Seattle, WA. I am currently a K-8 Lab Coordinator. I have a passion for educational technology integration and curriculum design, especially when it comes to the social sciences. Archives
April 2021
Categories
All
|
 RSS Feed

